Using Gatsby Image
Whoo! Hopefully you're still around from the previous lab--that was a doozy!
In this lab, we're going to create a Bio component that we can re-use in several places. This Bio component will contain a brief description of who you are and what you do and it will display an optimized version of your avatar--all from Drupal!
The first thing we will do is create the Bio page in Drupal.
Creating the page in Drupal
Similarly to creating an Article, we will now create a Page. Articles tend to be more time-sensitive (blog posts, news, etc.) whereas a Page tends to be more permanant in our setup.
- Log on to your Drupal CMS
- Content -> Add Content -> Page
- Fill out the necessary details; be sure to title the Page
Bio - Add a featured image (your avatar? a favorite photo?)
The end result should be that a Bio Page is visible in the Content tab within your Drupal instance.
Creating the Bio React component
First things first... we need to create our React component!
touch src/components/bio.js
We will need to create a "shell" component, so create it initially with the following structure:
import React from 'react';export default function Bio() {return null;}
this won't render anything to begin with, but soon enough we'll bring this to life!
Creating the GraphQL query
In order to bring this component to life, we first need to craft the underlying query that gives this component data! Remember that GraphiQL (http://localhost:8000/___graphql) is very helpful here!
What we will do is query for the nodePage by a unique identifier, perhaps a title ;) GraphQL has amazing built-in querying features to enable this type of functionality. For instance, if we had a page with a title of About, we could query it like so:
{nodePage(title: { eq: "About" }) {title}}
We will want to grab the html from the childMarkdownRemark and we'll also want to grab the featured image!
Need a hint?
{bio: nodePage(title: { eq: "Bio" }) {relationships {field_image {relationships {field_media_image {localFile {# note the below is not supported in GraphiQL# but it will work in your React component!childImageSharp {fixed(height: 48) {...GatsbyImageSharpFixed}}}}}}}fields {markdownBody {childMarkdownRemark {html}}}}}
Using the GraphQL query
Now that we've written a query that retrieves a field image and the html from the Markdown-powered bio, we can render this to a React component with Gatsby!
We are going to use a StaticQuery. A StaticQuery is special in that it doesn't accept variables and works in any React component in our src directory, so it's a perfect use for our Bio component. For an example of how to use this, check out the below example:
import React from 'react';import { StaticQuery, graphql } from 'gatsby';export default function Author() {return (<StaticQueryquery={graphql`{site {siteMetadata {author}}}`}render={data => <h1>{data.site.siteMetadata.author}</h1>}/>);}
With this in mind, we will want to:
Use a
StaticQueryinsrc/templates/bio.jsPass the query to our React component
Render this data in our React component
Use the
gatsby-imagecomponent to render afixedimage, e.g. consider the following exampleimport React from 'react';import { StaticQuery, graphql } from 'gatsby';import Image from 'gatsby-image';export default function Avatar() {return (<StaticQueryquery={graphql`{file(relativePath: { regex: "/some-image.jpg/" }) {childImageSharp {fixed(width: 48) {...GatsbyImageSharpFixed}}}}`}render={data => <Image fixed={data.file.childImageSharp.fixed} />}/>);}
Need a little help?
import React from 'react';import { StaticQuery, graphql } from 'gatsby';import Image from 'gatsby-image';import styles from './bio.module.css';export default function Bio() {return (<StaticQueryquery={graphql`{bio: nodePage(title: { eq: "Bio" }) {relationships {field_image {relationships {field_media_image {localFile {childImageSharp {fixed(height: 48) {...GatsbyImageSharpFixed}}}}}}}fields {markdownBody {childMarkdownRemark {html}}}}}`}render={data => (<div className={styles.bio}><ImageclassName={styles.avatar}fixed={data.bio.relationships.field_image.relationships.field_media_image.localFile.childImageSharp.fixed}/><divclassName={styles.description}dangerouslySetInnerHTML={{__html: data.bio.fields.markdownBody.childMarkdownRemark.html,}}/></div>)}/>);}
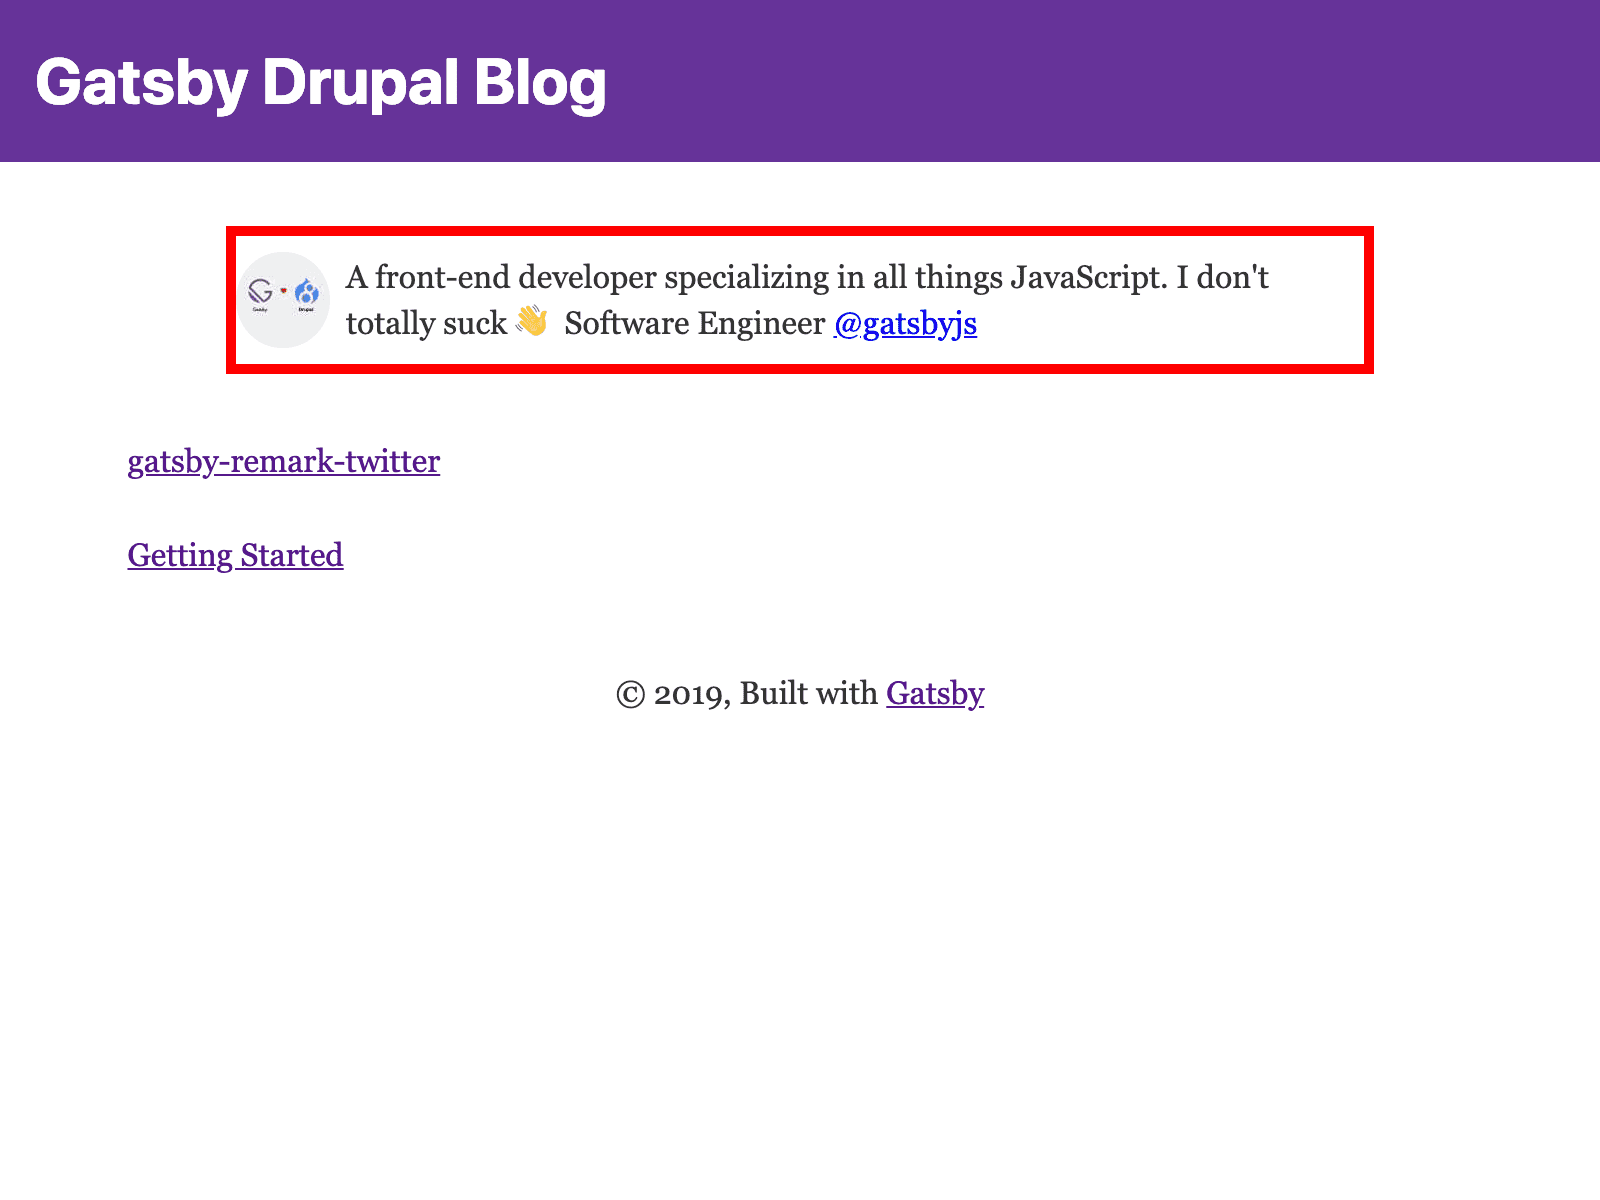
At this point--you've hopefully been able to render a fixed image with gatsby-image and additionally render a bio description as HTML translated from Markdown. Neat!
We'd now like to actually use this component in various pages, particularly we'd like to show it on our index route (above all blog posts) and on each blog post, below the contents of the blog post.
Re-using the reusable component
In React, you import components that you intend to re-use. For instance, if we have a Header component in src/components/header.js, we can use this component like so in src/components/layout.js:
import React from 'react';import Header from './header';export default function Layout({ children }) {return (<div><Header /><main>{children}</main></div>);}
This core re-usable principle is one of the hallmarks of a well-structured React application. As such--let's re-use the Bio component we just created in the following places:
src/pages/index.jssrc/templates/article.js
When you're done, you should see something like the following on the index page and the article template!